Adding Document Sections
Add, Remove, Reposition and Customise Your Sections

Megan
Last Update 5 years ago
In addition to the standard sections that form your document template. You can add custom sections to your document.
By hovering over any existing section of your document you will see the following appear;

You can use the [Move Up] and [Move Down] buttons, to reposition any section on your document.
The [1/1] button allows you to change the width of each section. See Changing the width of your sections guide for more help.
The [eye] button allows you to grey out sections. This is useful if you have sections that can be set on the template and then rarely need changing once used as a quote.

Add new sections via the [Add+] button (it adds it below the current section)
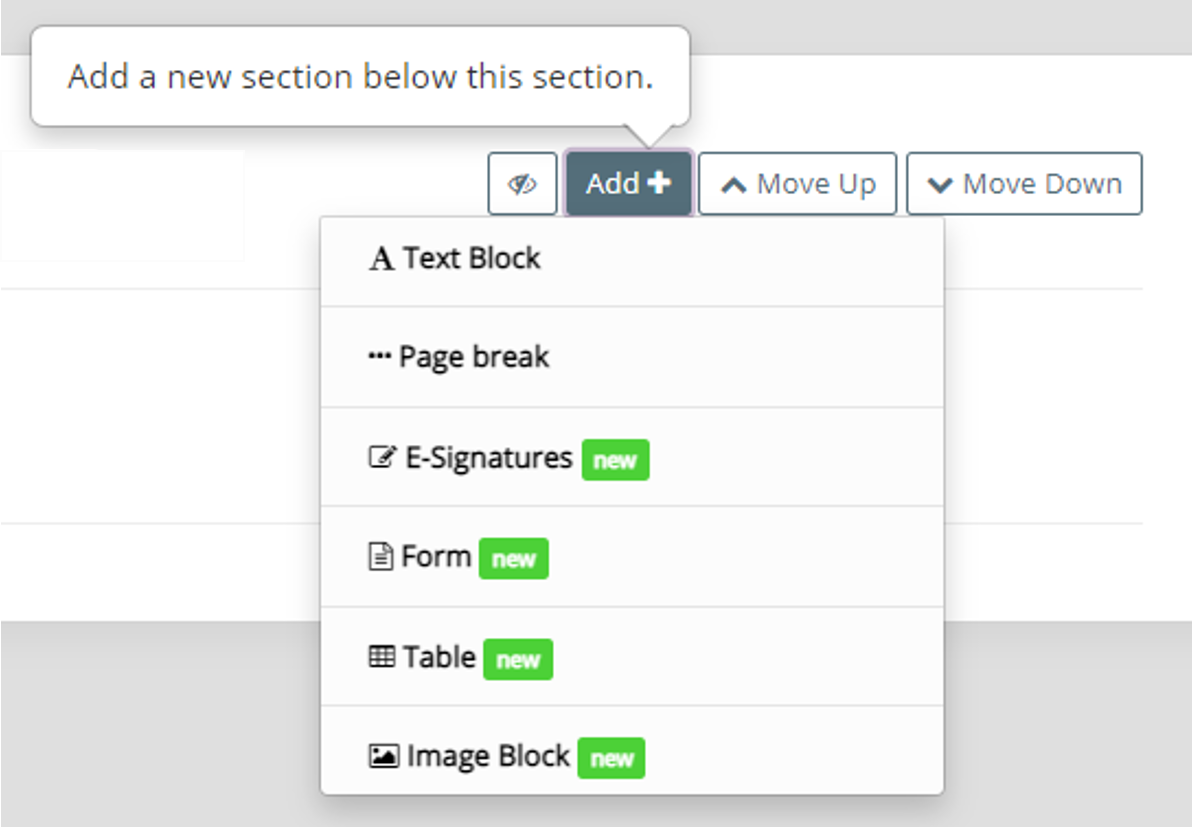
Text Block - select this to add more text to your document. See Using Text Blocks guide for more help.
Page breaks - select this to separate section ie.put a break in the page or to create whole new pages. See Using Page Breaks guide for more help.
E-signature - select this to add a place for you and/or your customer to sign. You can add multiple signatures here but you can only add one e-signature section. See Using E-Signatures guide for more help.
Form - select this option to add fields to your document that that you would like your customer to interact with. See Using Forms guide for more help.
Table - select this to create a table to display information in a clear and concise way. See Using Tables guide for more help.
Image Block - select this to add more images to your document. See Using Image Blocks guide for more help.